TILER DERBY

finance options available

DERBYSHIRE TILING SPECIALISTS

TILERS DERBY

Reliable Tiling Services

At Derbyshire Tiling Specialist our tilers relish the opportunity to create functional and aesthetically pleasing surfaces in homes, commercial spaces, and public areas.

Our tilers can work with a variety of materials, techniques, and designs, each requiring specific skills and expertise and as part of Derbyshire Specialists Group can provide tiling along with other trades that mean you have all trades from one company in once place to complete a wider kitchen or bathroom update, extension or complete home renovation.

Our skilled tilers can install a wide variety tiles to create functional and aesthetically pleasing surfaces in homes, commercial spaces, and public areas. Our tilers work with a variety of materials, techniques, and designs, each requiring specific skills and expertise to provide a perfect tiled finish to your walls and floors.

  • Derbyshire Tiling Specialists tiled splashback in Derby

    Slide title

    Write your caption here
    Button

TILER NEAR ME

If you live in Derby or further afield in Derbyshire our tiler will come to you. So if you are looking for a tiler near me we're ideal!

TILER CONTRACTOR SERVICES

FLOOR TILING | WALL TILING | FEATURE WALLS | COMMERCIAL TILING

TILING DERBY

From ceramic and porcelain to natural stone and mosaics, we have installed a diverse range of tiling projects with no two jobs being the same. Our attention to detail in all aspects of tiling: surface preparation, measurement, cutting, adhesive application, and grouting ensure a quality finish.  Whether we are working on a small residential bathroom or a large commercial space, our skilled tilers create beautiful and functional environments.

Whilst many people including experience DIYers may think that they can 'stick tiles to a wall' achieving a proper results requires an understanding of different materials, adhesives, grouts, and sealants. Using and fitting products that are not suitable for specific environments, such as wet rooms or outdoor areas may result in a short term cosmetically pleasing finish, but one that can lead to a longer term breakages, fractures and an unsafe area.

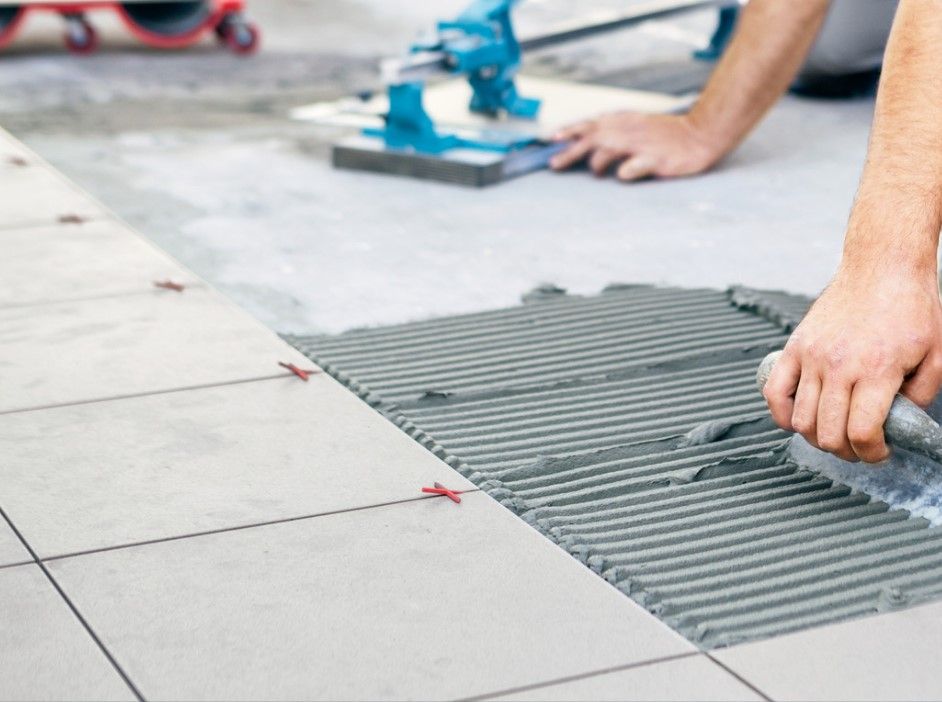
Our tilers will assess the existing surface as tiling onto an uneven surface is not going to give an acceptable finish. Surface preparation is essential for a long-lasting tiling job. This is especially true for floor tiling so our tiler will level floors, repairing wall cracks, and apply primers or waterproof membranes where appropriate.

If you have already selected the tiles you want fitted our tilers will accurately measurement the areas in relating to your tiles and can advise on the number of tiles needed taking into account your desired layout, ensuring symmetry and alignment and the amount of tile which may need cutting around existing fixtures.

Our tilers will cut and shape tiles to fit around obstacles, such as pipes, corners, and electrical outlets. Using proper tools such as tile cutters, wet saws, and nippers they can achieve an exceptionally tight and neat finish around these obstacles.

Depending on the tiles you have chosen our tiler will determine the type and thickness of the adhesive applied (i.e. cement-based or epoxy) to prevent tiles from slipping or cracking. If you are mixing plane tiles with patterns they will discuss the layout with you to ensure these are laid at appropriate intervals to ensure you get the effect you are aiming for.

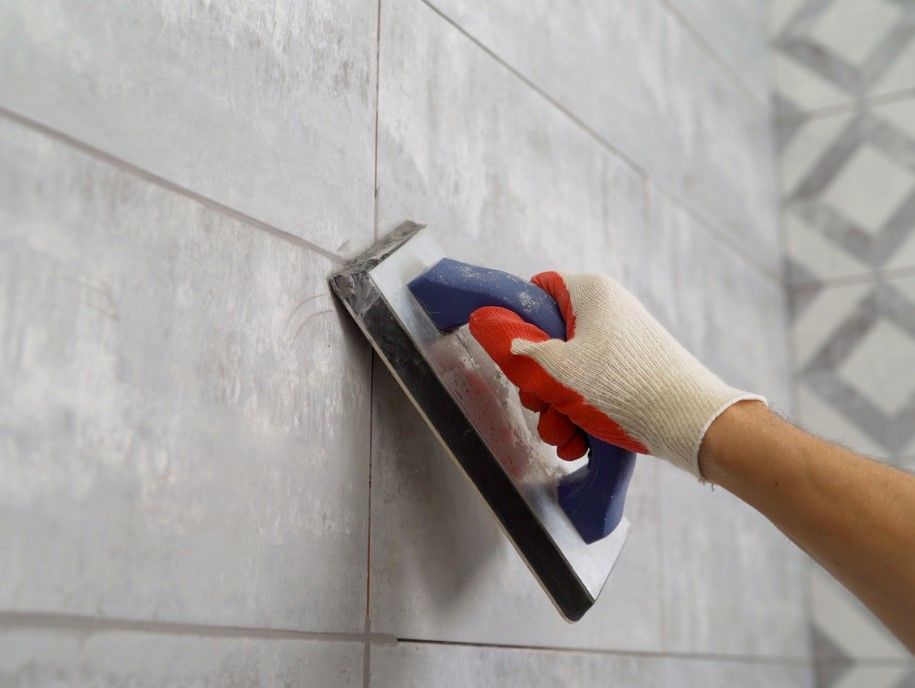
To finish things off our tilers  will grout the gaps between the tiles to provide a finished look. The grout lines will be even and clean, before sealing to prevent staining and moisture penetration and maintain the aesthetics for a longer period of time, which is important in high moisture room such as bathrooms and kitchens. Don't be afraid to use a contracting grout colour to create a more feature driven finish! Our tilers attention to detail will ensure that patterns align and there is consistent spacing between tiles to achieve a flawless finish.

Whilst tiling can be a somewhat messy job our tilers will respect your property and follow strict safety guidelines too . However, if you do need to be in and around them whilst they are working they will agree a safety protocol with you to allow you to get on with your work whilst they get on with theirs.

Simply sent through an enquiry to start the ball rolling.

TILERS NEAR ME

If you live in Derby, or further afield in Derbyshire our tiling service comes to you. So if you are looking for tilers near me we're ideal!

Tiling Installation & Fitting Derby

Our tilers have been fitting and installing tiles across Derbyshire for many years locations include Alfreton, Belper Allestree, Ilkeston and even as far as Chesterfield for larger remodelling projects. The attention to detail is what makes our tilers sought after. Whilst it can be very tempting to have a go at tiling yourself, if you get it wrong it can be quite messy and destructive to put right. Even if you do make a good job of it initially it will be the longevity of staying up and especially in moisture and water prone locations has it been properly grouted and sealed to ensure it stays in place for many years to come?

Our tilers have had years of experience and have all the proper tools and techniques to ensure a perfect fit every time. The key to this comes down to preparation. Whether floor or wall tiling getting the surface ready for tiling is key. For floors this will mean assessing the stability of the existing subfloor. If there is too much movement this will increase the likelihood of tile or grout cracking. This may be alleviated by screeding the floor to create extra stability but if this course of action is outside of your budget we can look at alternative such as luxury floor tiles which will be able to cope with more subbase movement than ceramic tiles. Minor defects in a robust subfloor can be accounted for by subtle adjustments in the adhesive levels ensuring  perfectly aligned tiles which allows for neat and tidy grouting.

Depending on whether you chose ceramic, porcelain, natural stone, LVT or stone tiles we know which adhesives and grouts to use to ensure a perfect tile fit every time. With our detailed tile cutting equipment we can maximise the amount of tile showing and minimise the amount of grout used around awkward pipes and architraves. Whilst this will take a little longer it is this attention to detail and pride in our work makes our tilers sight after. High quality tiling should last for many years and elevate your property, done bady it can have the opposite effect.

Simple get in touch to arrange a quote and we can assess what tiling options may be most suitable for your project.

commercial TILERS DERBY

At Derbyshire Tiling Specialists we also undertake commercial tiling work as well as residential. Whilst the application of the tiles themselves will be very similar the set up and approach will differ. The primary difference between the two lies in the scale and complexity of their projects. Our commercial tilers typically work on large-scale venues such as offices, schools, hotels and other multiple occupancy building such as student accommodation. These environments will typically benefit from using robust, durable materials for high foot traffic, high use and knocks and bumps. Durability will often have a slightly higher priority over aesthetics. Large format tiles and those design for heavy use are often specified which then leads to a more complex operation to get the tiles to the application site, especially if tiling is across multiple floors.

In terms of workflow, commercial tiling projects often follow tighter schedules due to other trades being on the site at the same time. Effective collaboration is key to coordinate effectively with other trades, such as electricians and plumbers. Whilst we do this a lot within the Derbyshire Specialists Group for residential projects larger commercial projects may have larger teams of other trades from outside the group too.

Safety regulations also play a crucial role in commercial tiling, where compliance with building codes and standards is mandatory. Residential projects, although still requiring adherence to safety guidelines, generally involve less stringent requirements. Our experienced tilers always carry out there work to the highest safety standards.
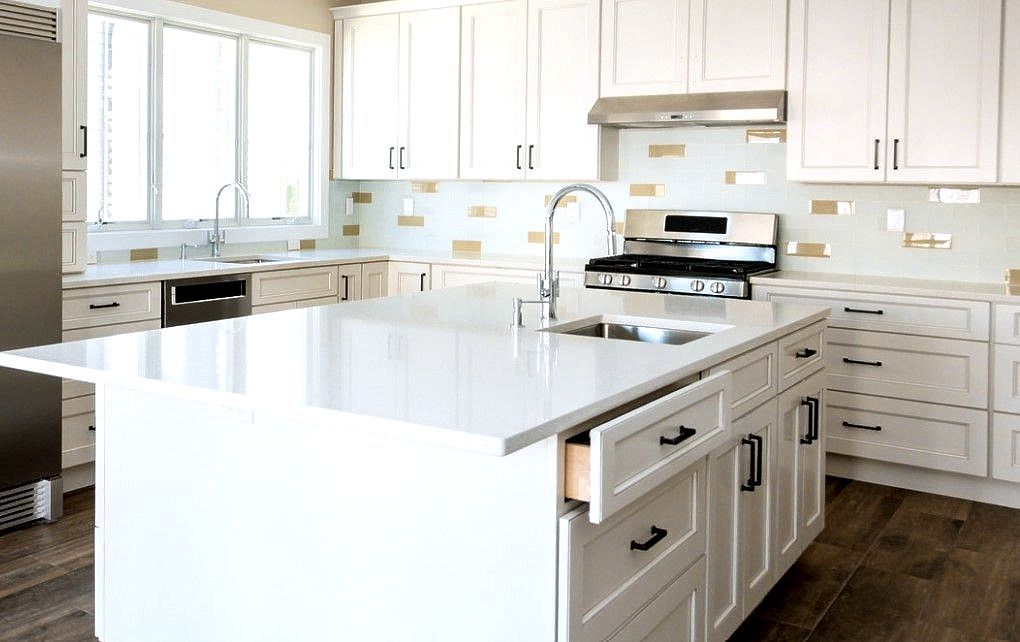
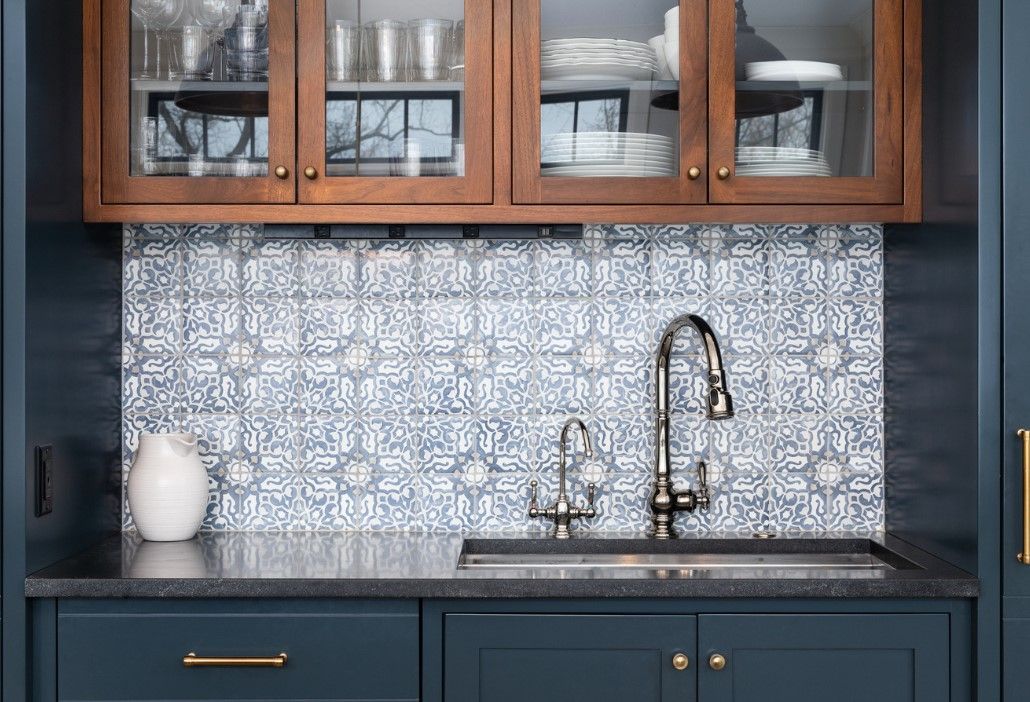
Kitchen Tiling

Tiling plays a major part in kitchen design, serving both functional and aesthetic purposes. Various types of tiles are typically used in kitchen renovations for across floors, walls, and splashback areas, each chosen for its durability, practicality and to help make your kitchen the statement room it is is some many households.  It is often referred to as the hub of the home and is typically the most used by most people in a household.

For flooring, ceramic and porcelain tiles are popular due to their resilience and resistance to moisture, making them ideal for high-traffic areas and for effectiveness with underfloor heating. Their range of designs, including wood-look and stone finishes, allows homeowners to achieve the desired aesthetic while ensuring practicality. 

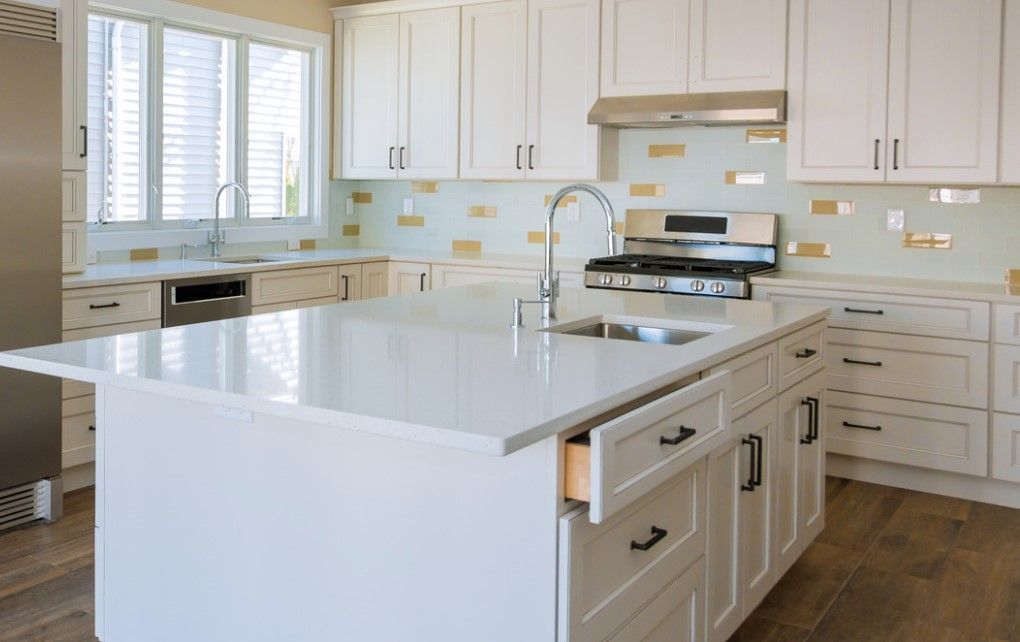
Walls may feature ceramic, glass, or natural stone tiles, providing a beautiful backdrop while adding texture and colour. Sections of walls can utilise different tiles to emphasise different areas.

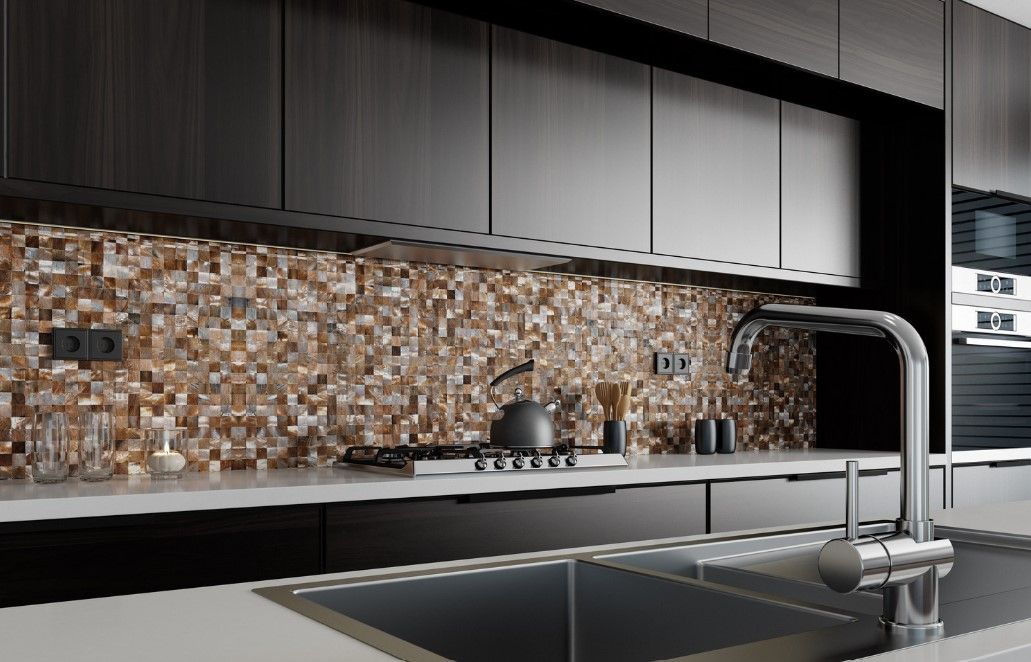
Tiled splashbacks are often adorned with a different set of colourful mosaic or decorative tiles, serving as both a protective barrier and a design element. These tiles can withstand heat and moisture, making them perfect for areas behind sinks and stoves. If you are not sure of what to select or how 'varied' you can mix and match you tiles simply get in touch with us today to discuss your kitchen tiling design ideas.

  • Derbyshire Tiling Specialists kitchen with mixed tiling in Derby

    Slide title

    Write your caption here
    Button

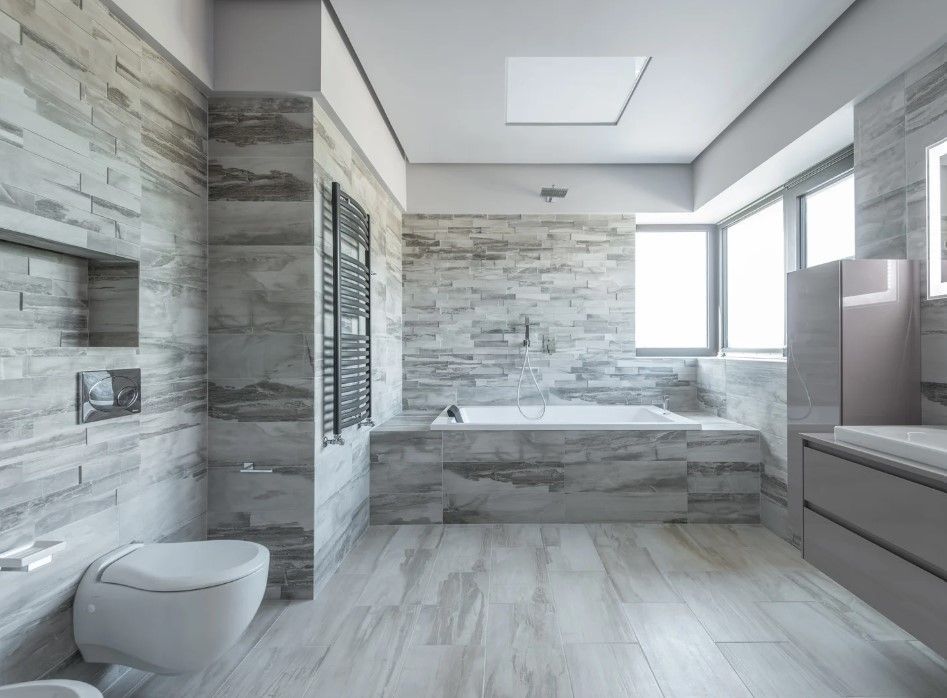
Bathroom Tiling Services Across Derby

Wet room and bathroom tiling is one of the main considerations as part of a bathroom design and renovation, as it not only enhances the aesthetic appeal of the space but also provides practical benefits.

We can install various materials and various sizes, with as ceramic, and porcelain being the most popular. Whilst mosaic tiling is still popular this has been overtaken buy large size tiling for bathrooms. With larger tiles it means less tiles, which leads to less grout. It is commonly known that over time it will be the grout which will attract direct which will become noticeable especially if a light or white grout is selected. The other growing alternative is to install shower panels. Whilst shower panels can be installed across all bathroom walls we still find that these are mainly fitted around the shower itself,  whilst the rest of the bathroom is tiled. This often provides a striking feature area for the shower due to the contrast between the two wall coverings.

  • Derbyshire Tiling Specialists floor and wall tiled bathroom in Derby

    Slide title

    Write your caption here
    Button

Floor Tiler Derby

We provide a comprehensive floor tiling service which includes floor levelling which is critical for floor tiles. Firstly if tiles are protruding they will create a trip hazard and if they are not fix sitting flat there are a much great chance that a floor tile gets cracked or broken.

Typically floor tiles will be much larger than wall tiles and some will be much thicker to cater for heavy footfall but these heavy duty floor tiles are mostly for commercial applications.

In the home, floor tiling designs even allow your floor to look like another material such as wood with many floor tile designs made to look like wooden planks and also formed in long plank like shapes rather than squares or rectangles. Often these plank floor tiles are used as an alternative to a skirting board with one tile fitted to the wall to find out more about this option simply discuss these with our tiler.

  • Derbyshire Tiling Specialists tiling a ceramic floor for a kitchen in Derby

    Slide title

    Write your caption here
    Button

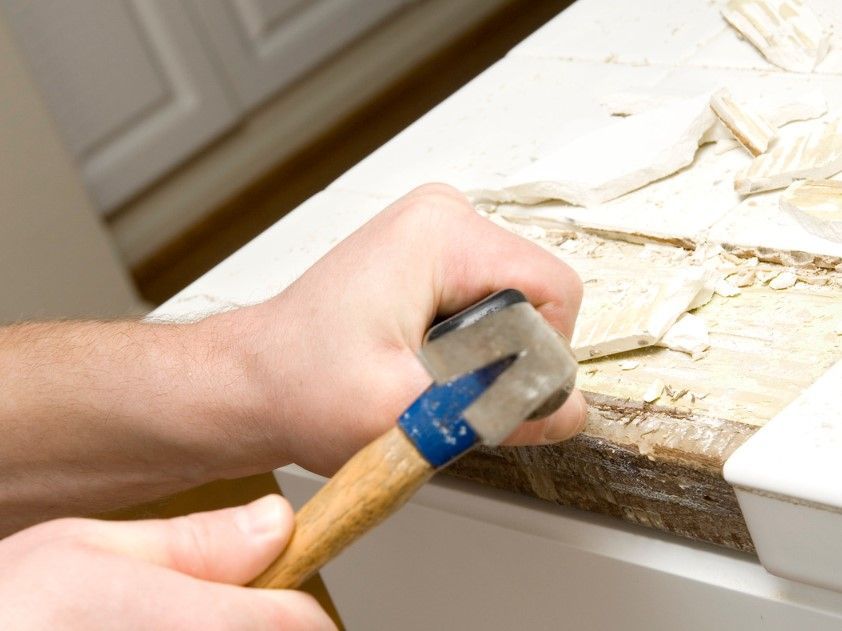
Tile Removal & Preparation

One of the most important aspect of tiling is surface preparation. It is crucial that the tile adhesive sticks to the substrate surface properly, possibly more so that the tile sticking to the adhesive - as any corrective work will be much more difficult.

For floor tiles a flat floor is critical to minimise the chance of tiles or grout cracking. In older properties when a modern extension has been added this can often involve two different types of sub base - concrete and wooden floorboards. Whilst the concrete is a great surface to tile on the floorboards need to be firmly fixed into place before any tiling can begin.

If renovating a bathroom it is likely that some, or all of the walls will be tiled. If so, we will remove them using our special purpose tools, which will provide dust-free tile removal. Minimising the dirt created in the process. Depending on the stud of the walls following tile removal, the walls may need to be re-skimmed or reboarded to provide an suitable flat surface for re-tiling. Whichever method is required, our tiling contractors will be able to prepare the wall surface appropriately to ensure a flush and waterproof finish.

  • Derbyshire Tiling Specialists tiling a ceramic floor for a kitchen in Derby

    Slide title

    Write your caption here
    Button

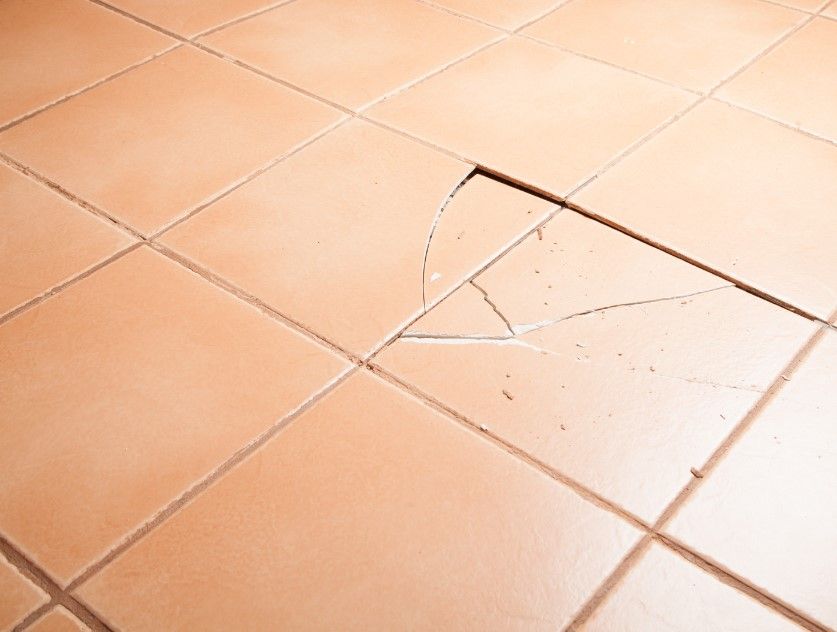
Tile & Grout Repairs

Repairing floor and wall tiles covers issues like cracks, chips, and loose tiles. Often, these problems arise from various causes, including temperature changes, moisture infiltration, poor installation, or heavy impacts. Depending on the nature of the damage it can affect the  aesthetics, functional and even safety of your space.

If a tile needs replacing hopefully you will have a few spares left over from the initial installation for a perfect match. We would remove the offending tiles along with thoroughly removing all the old adhesive and grout before resetting. This is the same approach for replacing a loose tile too.

Chipped tiles, if only a small chip may be fixed with a specialised fillers designed to match the tile colour. For deeper chips, the tile can also be replaced.

If you have cracks and gaps in a high moisture room such as a bathroom it is important to have your tiles repaired as soon as possible to prevent further water damage to your walls and floors.

  • Derbyshire Tiling Specialists removing broken tiles before replacing them in Derby

    Slide title

    Write your caption here
    Button

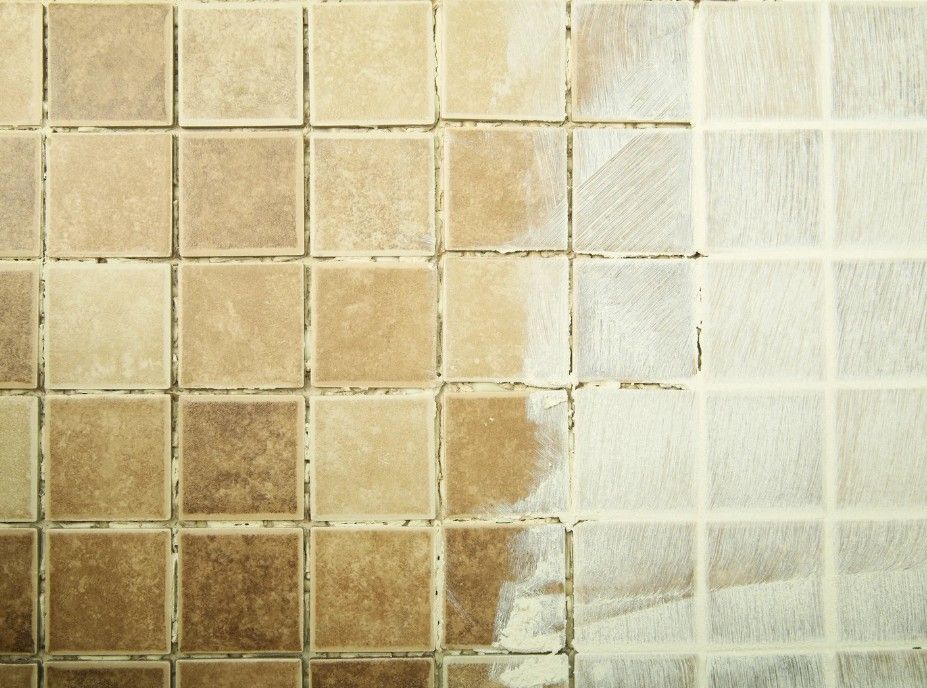
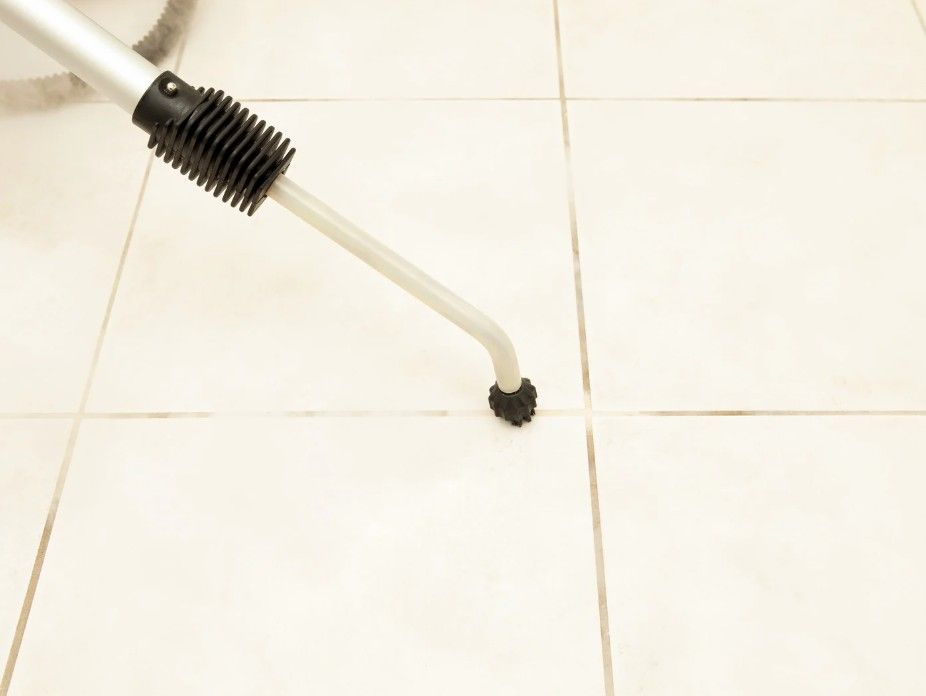
Grout Cleaning & Sealing

The option of grout cleaning and sealing provide a low cost way of revitalising tiled floor and walls. In kitchens - especially the splashbacks behind hobs light coloured grout can be stained by food splashes, especially if strong coloured spices are used such as tumeric or chilli powder these can provide an unsightly contrast against a light grout. This may lead to a more frequent cleaning to keep your grout looking good. To minimise this there are a couple of options:

  1. Regrout: and select a darker colour
  2. Regrout using an epoxy grout - this is an expensive stain resistant, non-porous option and will eliminate the need for frequent cleaning and resealing. Splashes can simply be wiped off.

In bathrooms where grout is subjected to much higher moisture levels discolouration and dirt build up is much quicker and often more extreme. A combination of soap, dirt limescale and hair colouring products can make their mark.

Depending on the level of dirt we may use a combination of solutions and steam to get the grout looking good again. One clean we apply professional grade sealant which should protect your grout for longer.

Regardless of whether the tiles themselves are ceramic, porcelain, or natural stone we can apply the same cleaning and resealing techniques. It's a much more affordable option compared to a full retile or replacement with shower boards.

  • Derbyshire Tiling Specialists cleaning the grout of a bathroom floor in Derby

    Slide title

    Write your caption here
    Button

Tile Restoration & Deep Cleaning

We also offer a tile restoration and cleaning service too. The performance that can be achieved will largely depend on the type of tiles you have, their current state and what final results you would be hoping for.

Our tilers in Derby can help restore you tiles in a variety of ways but before any restoration takes place tiles must be cleaned thoroughly to enable us to see exactly what state they are in and what restoration will be possible. Our knowledge of tiles means we will use the appropriate cleaning methods based on the tile type. The different porosity of the tile will detering it cleaning method and restoration options.

Popular areas for our tile restoration work are high traffic rooms such as hallways, kitchens and bathrooms.

If excessive discolouration has occurred, depending on the tile type, and whether we are dealing with floor or wall tiles we may be able to grind town the surface layer and then repolish another option for wall tiles is painting. This is growing in popularity as over it is a lower cost option than replacing to dramatically change the appearance of a tiled wall. However, other than having different colour in different sections this will mean patterns on a single tile will not be possible.

For natural floor tiles a major part of their restoration will be the resealing, which can provide a very noticeable transformation. If you are thinking of restoring your tiles call in the professionals, we know our tiles and know what cleaning and sealing is suitable to ensure long term results.

  • Derbyshire Tiling Specialists restoring mosaic tiling Derby

    Slide title

    Write your caption here
    Button

TILER IN DERBY

If you are looking for a tiler in Derby, simply get in touch with us today to discuss your requirements
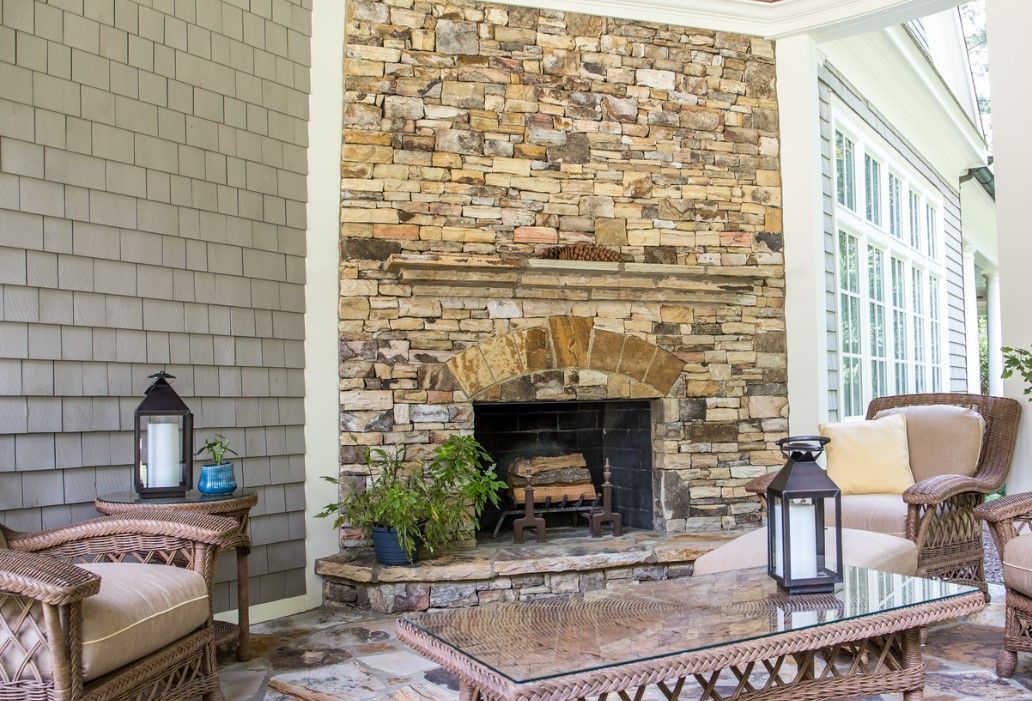
Feature Wall Tiling

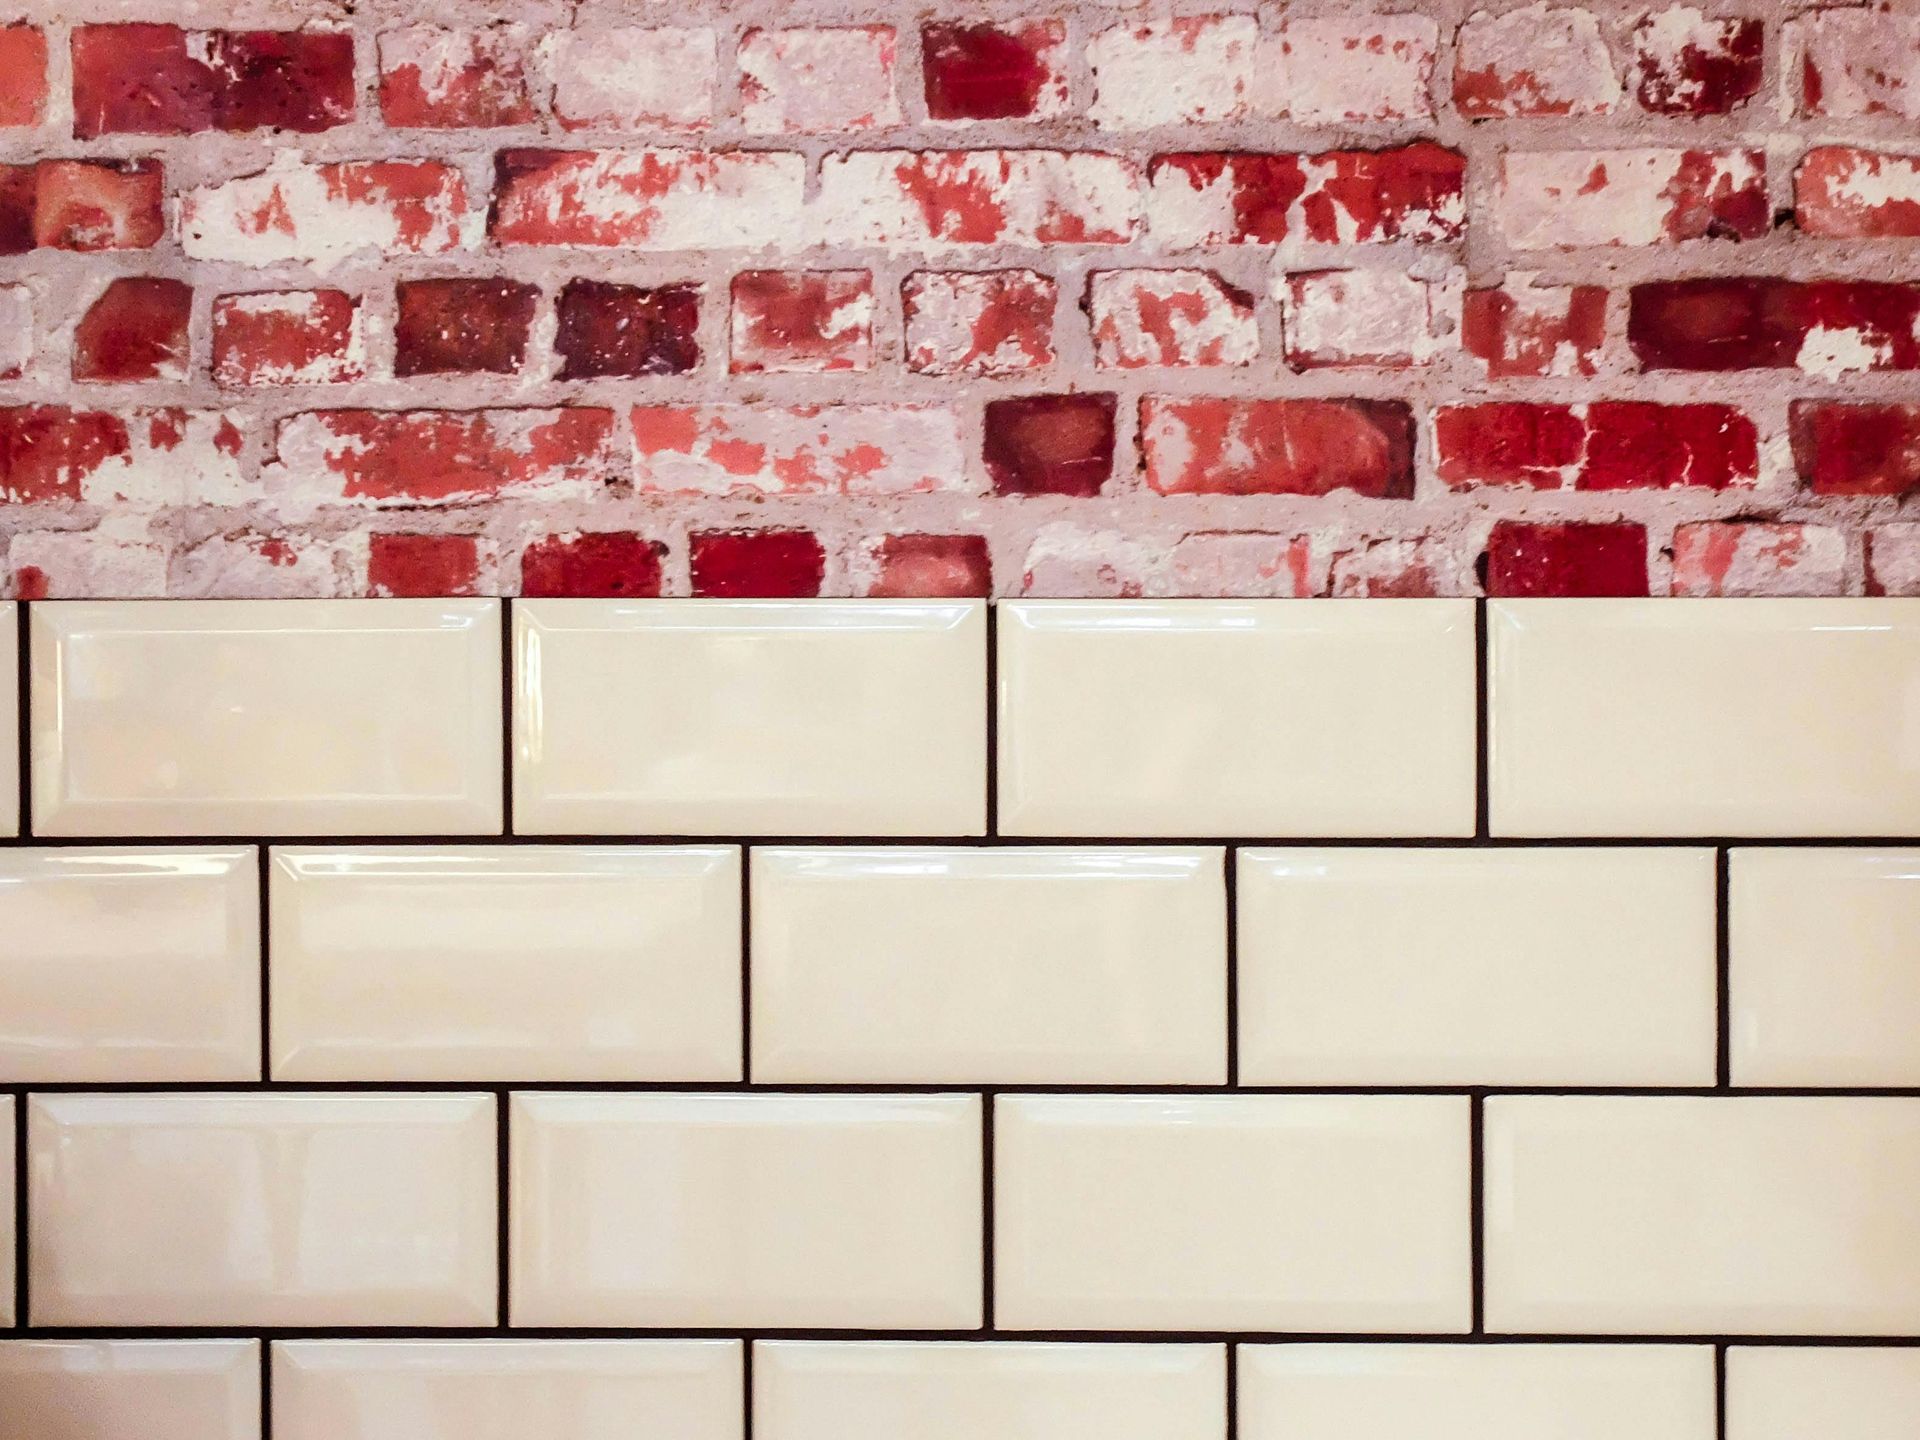
Feature wall tiling has emerged as a prominent trend in interior design, particularly in derby, where homeowners are looking to add character, style and textures to their living spaces. This design technique involves using decorative tiles to create a striking focal point, often in living rooms typically on one wall only or even part of a wall such as a chimney breast or media wall. Popular tile types include ceramic, porcelain, and natural stone often in a 'brick style' with each offering various textures, colours, and finishes. 

The growing popularity of feature wall tiling in Derby can be attributed to the increasing desire for personalisation and the influence of social media platforms that showcase innovative design ideas. A feature wall utilising tiling is low maintenance especially useful as a background against candles which deposit soot whilst burning. Wiping down tile compared to a painted or wall papered surface is quick an simple. contemporary tiles make feature walls an attractive choice for many, blending aesthetic appeal with practicality in the home environment.

  • Derbyshire Tiling Specialists two feature tiled walls at a property in Derby

    Slide title

    Write your caption here
    Button

Tile Selection

With so many tile options if difficult to know where to start when trying to select a suitable tile for a particular project as moisture and use of the room should also impact your decision as well as the colours and designs from an aesthetic perspective.

Here are some of the more common types of tiles with more information on our types of tiles page.

Ceramic tiles are one of the most common types of tiles used in the UK. They are versatile, affordable, and available in a wide range of colours followed by Porcelain tiles.

Natural stone tiles, include marble, granite, slate, and limestone, with each type of stone having their own unique characteristics, for handling and installation. Quarry tiles are unglazed and made from natural clay.

Mosaic tiles are small pieces of glass, ceramic, or stone typically pre connected to form a larger tile to speed up installation. Terrazzo tiles are made from a composite material, including chips of marble, quartz, or glass, set in a binder. They are known for their durability and unique aesthetics. 

Vinyl tiles are are cost-effective and versatile option for floors so should not be discounted as an option for floors.

  • Derbyshire Tiling Specialists customers choosing some tiles in Derby

    Slide title

    Write your caption here
    Button

Remodelling

When we carry out tiling installations across Derbyshire almost always this is part of a house or room remodelling exercise. If it is we can perform all the trade tasks involved including drywall installation  if you are looking to create difference partitioning or division in a room, or rooms. With kitchen or bathroom renovations we can provide fan installation  and all the plumbing installation, even if you have changed the layout of where you want your sanitary and shower units.

We can even carry our th furniture assembly of new kitchen and bathroom cabinets and storage and even if you decide not to tile from floor to ceiling we can install shower boards or sort out an interior painting required for ceilings or walls not otherwise covered.

As part of Derbyshire Specialists Group we have trade experts in all fields so your remodelling project can be completed smoothly with one guarantee and one invoice taking all the hassle out of dealing with multiple trades for a renovation project.

Simply complete our online form to arrange a quote.

  • Derbyshire Tiling Specialists customers choosing some tiles in Derby

    Slide title

    Write your caption here
    Button

Tiler Derbyshire

Areas Serviced by Derbyshire Tiling Specialists:

We cover Derby city centre and the following towns across Derbyshire:

Belper, Ilkeston, Heanor, Ashbourne, Ripley, Borrowash, Castle Donington, Melbourne, Alfreton, Sommercotes, South Normanton, Allestree, Quarndon, 

MOST COMMON DERBYSHIRE TILING QUESTIONS:

  • What should I look for when choosing a tiler?

    Firstly, it is important to look for a tiler with experience and expertise in the specific type of tiling work you require and ensure they appropriate insurance. 

    However, if they aren't able to communicate effectively, then you may not get the end results you expected. Good communication and understanding go a long way in ensuring that the final result meets your expectations. It can be very tempting to go along with a tiler that says yes to everything you ask just to win your work. A good tiler will highlight any potential risks, such as poor surface on which to tile.  This will ensure you have the best long term tiling finish not just one that looks nice for a short period of time before tiles crack or become loose.

  • Why should I choose Derbyshire Tiling Specialists in Derby?

    We provide tiling services for businesses and residential customers, focussing on a quality finish every time. Our approach to discussing projects with customers without using jargon means that you know exactly what you are going to get.

    As part of the Derbyshire Specialist Group we can combine specilist trades to ensure a perfect finish for kitchen and bathroom fits which require the additional skils of electricians, joiners and plumbers but you will only have once invoice and one gaurantee against all the work done - keep in simple and stress free.

  • What is your most common tiling job?

    The most common tiling job is often the installation of ceramic or porcelain tiles in residential homes, particularly in kitchens and bathrooms. These areas are frequently remodelled due to their high usage and the need for functional yet aesthetically pleasing surfaces which make tiles ideal. Additionally, backsplash installations in kitchens and stand alone toliets and sinks are popular to protect the surrounding wall from excessive moisture.

  • What are some common challenges faced by tilers in Derby?

    Tilers, just like any other trade can face a variety of challenges in their work that can complicate the installation process and affect the final outcome. 

    For tilers the primary challenge is achieving a level surface, as uneven floors or walls can make it difficult to lay tiles properly and lead to an unsatisfactory finish. Historically cutting tiles to fit around corners, fixtures, or irregular spaces used to take quite a bit of additional time but with modern gadgets and improved cutting tools this is no longer a challenge.

    If clients have not checked in with out tiler that they have enough tiles to complete the job and no more are available this can be quite a challenge with some compromise required to overcome this particular obstacle.

    Sometime having adequate working space to access and fix tiles can also be a challenge - however, we've not had a challenge we've not been able to overcome at Derbyshire Tiling Specialists.

Expert Tiler Tips

Visitor our blog for tips to help you keep your house in top shape.

By Derbyshire Tiling Specialists December 27, 2025
Let’s be totally honest with each other for a minute. You spent ages picking out those beautiful ceramic tiles—maybe they're that fancy marble-effect porcelain for your kitchen, or something tough for the hallway here in Derbyshire—and now? Now there's that line. That horrible, glaring, I-can’t-look-at-it-without-flinching line. It feels like the entire floor is ruined, doesn’t it? Like a total nightmare. The thing is, we see this constantly. From little terraces in Derby to big detached houses near Chesterfield, people get stressed about these marks. But listen to your local tiling specialist here: nine times out of ten, the problem is far smaller than it looks. Ceramic is incredibly hard-wearing, but you do need to know the proper protocol. Because if you grab the wrong abrasive for the wrong kind of scratch, you’re just making more work for yourself later on. Trust me on this one. So, forget the panic. We’re going to walk through the only way to approach this: diagnosis first, then the right ceramic tile repair method. Your First Job? The Fingernail Test. It’s Everything. Before you go near any sort of cleaning product, you must figure out what you’re dealing with. If your scratch feels one way, the fix is gentle polishing; if it feels another way, you need heavy filler. If you skip this simple test, you’re just gambling with your expensive tiles. 1. The Imposter: That Pesky Metal Scuff You see this everywhere, and it always looks terrible. It's a fine, usually dark grey or black line. You panic, thinking your tile is deeply gouged, but when you run your fingernail over it—and this is the crucial part—it feels smooth . Zero groove. Why? It’s metal residue, mate. Seriously. An aluminium ladder, a zipper on a boot, maybe someone dragged a metal kitchen stool. The metal is softer than the ceramic glaze, so the metal material transfers onto the tile's surface. It's sitting on top . It’s not actually damage to the ceramic. This is the easiest repair in the book. 2. The Superficial Pain: Glaze Abrasion Okay, this one is a scratch, but it’s tiny. It’s that fine, whitish haze you only spot when the light hits the floor just right . You feel it with your nail, but only barely—it’s extremely shallow. You haven't gone through the whole colour layer, just the clear top coat. This is usually caused by something sharp and small, like fine sand or grit—the kind that gets tracked in, you know, just daily life. The good news? Because it’s only surface-level damage, we can often polish this right out. 3. The Real Problem: The Deep Gouge Now this is the one that causes the real trouble. You run your fingernail over it, and it catches. It stops you dead. That scratch is wide, it's prominent, and it’s a totally different colour—usually dull white—compared to your tile. Why? Because you’ve sliced right through the hard glaze and hit the porous, soft clay body underneath (what we call the bisque). Look, this is structural damage. You can’t polish away exposed clay. It needs proper filling, proper sealing, or—and I’m not going to lie to you—you might be looking at a replacement, especially if it’s in a wet area. Phase 1: Easy Wins—Don't Bother with the Hardware Store Yet! If your damage falls into categories 1 or 2, you absolutely do not need to call us yet. We use these simple tricks every single day. The Microfibre-and-Eraser Scuff Remover For those metal scuffs (category 1), forget harsh chemicals. You need gentle abrasion. Clean First! Seriously, clean the mark with plain soapy water and wipe it dry. If there's any dust, you'll just create a real scratch while you're trying to remove the fake one. Grab an Eraser. A plain white vinyl pencil eraser (the soft ones, not the pink rubber block) works wonders. Dampen a melamine foam eraser—the "Magic Eraser" types—if you have one. Rub It Out. Just rub the scuff firmly. That fine abrasive quality lifts the soft metal residue right off the hard ceramic glaze. You wipe it clean, and boom—it's gone. It's shockingly easy. Baking Soda: Your Secret Weapon for Superficial Scratches For the light abrasion (category 2), you need a very fine, consistent polishing agent. And the best one? It’s in your kitchen cupboard. Make the Paste: Mix baking soda (bicarb) with just enough water to make a thick, gritty paste. Think about the consistency of a good, heavy toothpaste. Gentle Buffing: Put a little blob of the paste onto a clean, soft cloth—microfibre is perfect, by the way. Now, rub it into the scratch using small, gentle circular motions. Gently! We are just smoothing out those microscopic ridges on the clear coat. Rinse: Rinse the area clean and dry it off. If it doesn't disappear completely, sometimes one more careful application will do the trick. Phase 2: When You Have to Get Your Hands Dirty (The Glaze is Compromised) Okay, the light fixes didn't work. We're into medium-depth scratches now. This means we've got to either aggressively polish the surrounding area or physically fill the hairline void. The Automotive Garage Trick: Car Polishing Compound I know it sounds wild, but high-quality car scratch remover compounds are built to deal with clear coats—which is what your tile glaze is. They work by removing minute layers to blend the edges of the scratch. The How: Clean the scratch like a maniac. Apply a dab of the compound to a soft cloth, and use firm, controlled circular motions to buff the scratch. The Warning: If you’re tempted to use a power tool—like a drill attachment—stop. The heat and friction can ruin the glaze in seconds, leaving a huge, permanent dull spot. Stick to elbow grease and control. The Cosmetic Cover-Up: Clear Nail Polish For a very thin, very prominent scratch that you just want to vanish visually, we sometimes use a clear filler. Match the Sheen: This is crucial. If your tile is matte, use matte clear polish. If it’s high-gloss, use high-gloss. A mismatch will look terrible. The Fill: Apply a tiny, tiny amount—using a toothpick if necessary—directly into the groove. Let it dry completely. The clear filler reflects light just like the glaze, making the scratch optically disappear. It's clever, but it’s purely cosmetic. Phase 3: The Moment of Truth—Deep Gouges and Replacement If your fingernail is still catching, you have a structural vulnerability. You've exposed the soft, porous bisque, and that means water and stains are now a threat. You need to seal that area immediately. Why Epoxy Filler is the Only Patch You have to use a proper, two-part ceramic tile repair kit . It’s the only thing tough enough to mimic a glaze. The Challenge is Colour: You have to mix the colour tints in with the resin and hardener to match your tile perfectly before it sets. This is where most DIY jobs fail, because a bad colour match draws more attention than the original scratch. The Finish: You fill the gouge, let it set up slightly, and then carefully scrape the excess perfectly level with the surrounding tile face. This is fiddly, highly technical work. The Honest Conclusion: When We Insist on Replacement Look, if the scratch is wide, runs a long distance, or, God forbid, is a genuine crack, patching it is just a temporary bandage. As Derby tiling specialists , we’ll tell you straight: if the damage is structural, especially in a wet area like a shower, you need replacement. Patching a deep gouge with epoxy leaves a weak spot, and why compromise your entire floor for one tile? We can safely remove that damaged tile—without disturbing the rest of the installation—and set a new one seamlessly. Don't risk the integrity of your floor for the sake of one damaged piece. If you’re unsure about that deep gouge, or if you know you need a professional, clean fix, we’re the ones to call for tiling repairs that genuinely last. We make it look like the scratch never happened. Check out our expert Tiling Repairs and replacement services . Final Word: Don't Let it Happen Again! Seriously, prevention is always cheaper. Pad Everything: Go put felt or rubber pads on every chair leg and piece of furniture on your tiles. Right now. That’s the easiest fix. The Dirt Trap: Get good, heavy entrance mats. They catch the sand and grit that cause 90% of the superficial ceramic tile scratches . Clean Smart: Use a soft brush head on your vacuum. Don't push sand across the floor with a mop—it’s like rubbing sandpaper on the glaze.  You’ve got a beautiful floor. Keep it that way. If you need any advice on your installation or repair, we're your local experts. Get in touch with your local Derbyshire Tiling Specialists today.
By Derbyshire Tiling Specialists December 27, 2025
A feature wall, often referred to as a statement wall, is one of the most effective ways to introduce drama, texture, and sophisticated style into a home. Whether in a sleek modern kitchen, a luxurious bathroom, or a stunning living area, carefully chosen tiles can elevate an ordinary space into something truly extraordinary. In Derbyshire and across the Midlands, homeowners are increasingly turning to complex, large-format, or patterned tiles to create these focal points. However, the ambition of a feature wall can sometimes lead to disastrous results if the installation process is not handled with precision and professional expertise. Unlike standard floor or wall tiling, a feature wall demands absolute perfection—because it is designed to be looked at. A single misaligned tile, a hollow sound, or a visible error is magnified. This detailed guide, brought to you by Derbyshire tiling specialists , covers the five most common and costly mistakes made in feature wall installations . More importantly, we provide the tried-and-tested, expert solutions to ensure your next project is a masterpiece of craftsmanship, standing the test of time and attention. By understanding these professional secrets, you can ensure your investment in premium materials is protected and your feature wall achieves the seamless, high-quality finish it deserves. 1. The Foundation Fiasco: Forgetting to Prepare the Wall Look, if there’s one part of the job that people always try to rush or outright skip, it’s the prep. It’s dirty, it’s slow, and it doesn't look like progress. But trust us: this is where the entire job fails or succeeds. The Mistake: Just Sticking the Tile onto Whatever is There This is a rookie move. We've seen tiles slapped straight onto old wallpaper, loose paint, dusty plaster, or a wall that’s bowed out like a ship's sail. People figure the "super strength" adhesive will grab onto anything. It won't.  Why You’ll Regret Skipping Prep (The Cost of Rushing): Tiles Start Falling Off: Seriously. Any layer of dust, chalkiness, or flaky paint acts as a bond-breaker. The adhesive sticks to the loose layer, not the wall, and eventually, the tile will just peel off. This happens way more often than you think. The Wavy Wall Effect: Feature walls—especially those with a high-gloss finish—need to be perfectly flat. If your wall is bumpy, those bumps will be magnified by the sleek tiles and the light from your downlighters. It ruins the whole sophisticated look. Adhesive Failure: If the wall is highly porous (like bare plaster), it will suck the moisture right out of the tile adhesive before it has a chance to cure and form a proper chemical bond. Hello, weak tiles! How We Nail It (The Professional Method): Clean to the Bone: You need a clean, dry, and stable surface. That often means stripping, sanding, and wiping down everything until there’s zero dust or residue. True Leveling: If your wall is uneven—and in older Midlands homes, they often are—you can’t fix it with the glue. The wall must be leveled first, usually with a skim coat or leveling compound, to bring it perfectly flat and plumb. No exceptions Prime, Always Prime: This is crucial. We apply the right primer for the substrate. This controls the wall’s suction, ensuring the adhesive cures slowly and fully, maximizing the strength of the bond. For feature walls in a wet zone, like a shower, you must also apply a professional tanking (waterproofing) solution first. 2. The Visual Vexation: Poor Layout and Unbalanced Cuts You want your feature wall to look bespoke, like the tiles were made for that space. If you end up with awkward, tiny slithers of tile at the edges or in the corner, you’ve failed the visual test. The Mistake: Starting Blindly in a Corner The classic DIY move: find a corner and start laying tiles across until you hit the other side. This guarantees that any odd-sized cuts will be pushed to the end of the wall, making it look asymmetrical and unbalanced. Why Symmetry Matters So Much (It's All in the Eye): Distracting Edge Cuts: A cut that’s too thin (say, less than an inch) looks messy, jagged, and unprofessional. Your eye immediately goes there, not to the beautiful pattern. Pattern Mismatch: If you have intricate patterns or mosaics, starting from the wrong place can break the flow, creating a jarring junction where the pattern suddenly shifts or ends awkwardly. The Misaligned Socket: Oh, the sheer disappointment of realizing you're going to have a tiny tile cut around a socket—that’s often a result of not planning the flow from the start. How We Nail It (The Tiler’s Secret to Balance): Find the True Middle: We always start by determining the exact, dead centre of the wall. This is our reference point. The Measure and Balance: We measure the full width and then calculate how the tiles fall from that centre line to both edges. Adjusting for Aesthetics: The goal is to have the cut tiles at the left and right edges be the same size and substantial enough (never less than half a tile is our rule of thumb). If starting exactly centre leaves you with tiny cuts, we shift the whole layout half a tile width to one side. This makes the cuts on the edges identical and visually balanced—a huge professional differentiator. Use Fixed Lines: We use laser levels and perfectly plumb chalk lines to establish our vertical and horizontal guides. Every single tile aligns with these lines. This level of precision is exactly what defines high-quality feature wall tiling installation. Check out how precision enhances our projects: Feature Wall Tiling Service. 3. The Technical Tragedy: Incorrect Adhesive Application Tiling is a craft, but it’s also an exact science involving chemistry and materials science. Using the wrong glue, or the wrong technique, is the second fastest route to tile failure after poor prep. The Mistake: The Abominable ‘Dot and Dab’ Method I need to be blunt: if you see someone putting five or six blobs (dots) of adhesive on the back of a tile and sticking it up (dabbing), stop them immediately. It’s fundamentally wrong. Why Dot and Dab is Guaranteed to Fail: The Hollow Sound of Doom: Those blobs leave massive air gaps—hollow spots—beneath the tile. When you knock them, they sound hollow. That lack of support means the tile is highly prone to cracking if anything bumps it or if the house shifts. Moisture Traps: In wet areas, those hollow spots become reservoirs for water, leading to mould, mildew, and ultimately, the breakdown of the adhesive over time. It’s unhygienic and destructive. Wrong Adhesive Type: Are you using porcelain, stone, or ceramic? Is the tile large format and heavy? Using a cheap, rigid, quick-setting adhesive on heavy porcelain is begging for trouble. Porcelain is non-porous and needs a polymer-modified, flexible adhesive that works chemically, not just physically. How We Nail It (The 100% Coverage Rule): Match the Glue to the Tile: We always select a flexible, high-performance adhesive (S1 or S2 rated) designed specifically for the weight and type of tile. This is non-negotiable for large-format tiles. The Correct Trowel: We match the size of the notched trowel to the size of the tile. Larger tiles need a deeper, wider notch (e.g., 10mm or 12mm) to ensure enough adhesive volume is transferred. Solid Bed is Law: We use the trowel to comb the adhesive onto the wall in uniform, parallel lines. Our standard is near 100% coverage —a full, solid bed of adhesive under the tile. This is the only way to guarantee structural integrity. Back Buttering: For LFTs (Large Format Tiles), we also apply a thin, flat layer of adhesive to the back of the tile before placing it into the combed adhesive on the wall. This is known as back buttering, and it ensures total contact, leaving absolutely no air gaps. 4. The Hidden Hazard: Forgetting About Movement Joints Your home is a living structure. It expands when it's hot, contracts when it's cold, and flexes with the foundations. The tiling is rigid. When you put a rigid surface onto a moving structure, something has to give. The Mistake: Tiling Tight into Corners and Edges Many people simply tile right up to the next wall, the floor, the ceiling, or the window frame, filling the tiny gap left with hard, inflexible grout. Why This Causes Ugly Cracks Down the Road: Pressure Cooker Effect: When the temperature changes, the large sheet of tiling expands. If it's restrained tightly on all four sides, the pressure builds until it finds the weakest spot—usually resulting in a crack running right through the middle of the tiled area or at the corner joints. Corner Chaos: Internal 90-degree corners are where two different walls (and potentially two different substrates) meet. They move independently. Filling this joint with rigid grout means it will crack, guaranteed. How We Nail It (Managing Structural Stress): The Perimeter Safety Gap: We always leave a deliberate, small gap (usually 2-3mm) where the tiled surface meets the ceiling, floor, or any adjacent wall/fixture. Flexible Filling: That perimeter gap, and all internal corners, are never filled with cement-based grout. They must be filled with a high-quality, flexible, colour-matched silicone sealant . This sealant stretches and compresses with the building movement, absorbing the stress and preventing failure. Long Walls Need Breaks: For exceptionally long feature walls, we may have to incorporate specialist expansion strips into the main tiled field to break the area into smaller, safer sections. 5. The Finishing Fumble: Rushing the Grout and Seal The final 10% of the job determines 100% of the visual quality. You've done the hard part, now don't get impatient and ruin the clean finish. The Mistake: Grouting Too Early or Not Sealing Porous Tiles This is usually a tired mistake. People rush to see the final result, grout before the adhesive is cured, or they fail to clean off the grout haze properly. Why You End Up with a Messy Look: Discoloured Grout: Grouting too soon traps moisture from the adhesive beneath the grout. This leads to inconsistent, patchy colours in the grout lines that look awful and are impossible to fix. Permanent Haze: That fine cement residue left by the grout (grout haze) is stubborn. If you let it cure and dry fully on the tile face, it's incredibly difficult to remove without potentially damaging the actual grout joints. Your tiles will look dull and hazy, not sharp. Stained Stone: If you're using natural stone—a beautiful choice—and you skip the sealant, the pigment and water from the grout will instantly soak into the stone, permanently staining the edges. A costly blunder. How We Nail It (The Impeccable Finish): Wait for the Cure: We follow the adhesive manufacturer’s instructions to the letter, waiting the full 24–72 hours before touching the wall with grout. Patience pays off. The Right Product: For a feature wall in a bathroom or kitchen, we often recommend a specialist epoxy grout . It is non-porous, 100% stain-proof, and far more durable than traditional cement grout—a true investment in longevity. Clean, Clean, Clean: We use a damp (not soaking wet) sponge, cleaning diagonally across the grout lines, and meticulously change the rinse water multiple times. The goal is a perfectly clean tile surface. We often return the next day to wipe away any residual 'haze' with a mild, professional cleaning product. Seal and Protect: For any natural stone, or even highly textured ceramics, a high-quality penetrating sealer is the final barrier. It protects the tile and the grout from stains and moisture, locking in the quality for years. Secure Your Investment: Choose Your Local Derbyshire Experts A feature wall is a highly visible, high-impact design choice. To protect your investment in premium materials and ensure the long-term structural integrity of your tiling, you need the experience and precise methods of a specialist. When you look for professional tilers near you , you're looking for someone who understands not just the theory of these five mistakes, but who has the practical, local knowledge of substrates and conditions in Derby and Derbyshire . We bring that deep technical knowledge and a guaranteed commitment to quality to every home. Don’t gamble on your dream wall—secure a flawless, stunning, and durable finish from the experts. Click here to visit our homepage and discuss your feature wall project with our team to day
Bathroom Tilers
By Derbyshire Tiling Specialists October 29, 2025
Discover expert bathroom tiler Derby services to transform your space. Get professional tiling, stylish designs, and long-lasting results for your home.